Photobucket Photobucket Photobucket Photobucket
Showing posts with label house and home. Show all posts

Monday, May 13, 2013

preggo projects

One of the things I was worried about for this pregnancy was the fact that we were COMPLETELY NEWBORN READY before we even conceived.  I mean, there are things we could do to improve the nursery (ie. hang pictures on the walls), but anything a person would worry about getting in place before baby comes, we’ve already got. 

And of course the second I found out we were having another boy I took all of the boy baby clothes out of their storage bags in the (nursery) closet and reorganized them.  I’ll still have to wash them come month nine so that they are fresh and clean for the new baby, but otherwise, clothing prep is done.  If I’m being completely honest, I never took any of the newborn clothes out of the dresser after Griffin died.  The bigger clothes were easier than looking at and touching all of those cute little things we’d bought for him and that he was supposed to be wearing then.  Going through it all again a couple weeks ago brought back another big cry fest.  It’s still not fair. 

But regardless, I am so excited to be expecting another baby, and I want to have projects to complete each week to help pass the time this pregnancy.  So here is my list of 20 things to complete in the next 20 weeks!  Not all of them are baby related, but a lot will make life easier for both while pregnant and with a newborn.

1.  Cloth Diapers (DIY some new fitted covers and pocket diapers)
2. Reupholster Glider
3. Nursery closet shelving system
4. Nursery brag wall (newborn photos, birth details, shadow frames of all kiddos)
5. Curtains and valance
6. Artsy mobile
7. Name art
8. Baby brother/big sister shirts
9. Big sister nook in nursery
10.  New baby carrier for me & play mei tai for Emily
11. Upholster master bed and headboard
12. Foam cushions for foyer bench
13. Toy storage in basement
14. Install fence and garden beds in backyard (Supervising!)
15. Cutesy camping trailer (new curtains, possibly new cushion covers)
16. Remove pond & sod hill
17. Arrange outdoor patio
18. Find plaque or stone for Griffins tree or garden.
19. Repaint/decorate guest/kids bathroom
20.  Get really good at doing laundry in a timely manner.

A couple of these are up to the hubby to complete, with my assistance/guidance, especially the fence and pond removal.  I’ve been digging up all of the plants around the pond myself, but all of the levelling and sodding will have to be up to him.

They also probably won’t be completed in this order. Outdoor/trailer stuff will likely all happen this month or the next, with a lot of the sewing projects happening as I need to slow it down a bit.

Wednesday, July 25, 2012

preparing for 2 under 2

Ok, so that’s mostly a joke since I’ll likely only have 2 under 2 for about a week before Emily turns 2, but I don’t think passing that milestone is really going to make life that much easier.  I’ve known for a long time that getting into the habit of having daily morning and evening routines would make my life easier and my house much cleaner.  We’ve already made the decision to put Emily in nursery school a couple of mornings a week so that I can go grocery shopping and get some deeper cleaning done around the house AND spend some quality time with our new little boy, but I needed a way to make that time at home more efficient so that our afternoons can be spent enjoying each other and not with mommy cleaning while Emily complains.

Domesticity does not come naturally to me.  At least not the cleaning portion of it.  I don’t like the feeling of dirt and crumbs on the floor so I Swiffer Vac at least twice a day, but messes seem to come out of nowhere and take over sometimes.

Screenshot1

Lately I’ve been using an app called Home Routines.  It actually comes preloaded with a lot of the Fly Lady routines if you’ve ever gotten into that, but I deleted a lot of that off and streamlined it to the routines and tasks that are important to keep this place running.  You can set how often you’d like the stars in your lists to clear, and how often individual lists show up.


I really liked this cleaning schedule I found through Pinterest, but I found I was a lot more likely to get the upstairs tasks completed if I did them all before I went downstairs for the day, so hanging a list like that on the fridge would just end up adding to the clutter on there.

So all I did was input the morning and night routines as lists that show up and reset daily, create a weekly tasks list that shows up daily but resets once a week, and create a ‘swing day’ list that is hidden until the day it needs to be completed and resets once a month.

My lists ended up looking a little different than the ones above, just because I wanted things organized a little differently, but overall it’s been working pretty well for us.

If you’ve got an iPhone or iPad, you should check out that app, it may just change your life!

I wasn’t compensated at all for this, and Home Routines has no idea who I am, I just really loved the product! Sometimes simple is better!

Friday, April 13, 2012

the one with all the lists

(alternatively titled: i should be studying.)

I have been feeling really overwhelmed lately. 

We sat down with a financial planner a few weeks ago, and realized that while we’re in no bad place financially, it would be a good idea to find ways to bring in more income if we want to start putting more money towards retirement, emergency savings, and building for our goals (such as finishing the basement, buying a tent/travel trailer for camping, and going to Europe (that one’s a loooooooong way off).  We also decided to do a ‘no spend’ April, meaning that we wouldn’t be buying any stuff this month, other than groceries.  Of course this is the month that all of the things I want are on sale!\

Anyways, since Craig already works full time and is often going up North for weeks at a time, and I am a stay at home mom, the burden to bring in some more income has fallen to me.  I already do some daycare out of our home and sell Avon, but it’s not consistent enough to put it under income in the budget and to be able to add expenses on the flip side.

As a result, we’ve decided for me to start training/working as a financial planner with Primerica (which is actually a good fit for me if you’ve being around her for a while and seen all of the financial/budget posts I’ve done (and loved doing!)), so I’ve been studying for the first half of my life insurance course this weekend (AND taking care of the daycare boys, AND spending most of the night up with Emily since she’s getting her eye teeth and teething for her means constant waking at night).  I pray for anybody who has 2 year old twins and a 3.5 year old, because that’s basically how I spend many of my days when other people’s kids are here (Emily is included in that), and maybe it’s just the pregnancy, but it exhausts me.

So anyways, here is everything we have to get done before the baby comes at the beginning of August (I’m 24 weeks tomorrow people!):

Baby stuff:
-Paint nursery
-Set up crib and change station
-Hang curtains and decorate
-Track down some boy clothes hand-me-downs from friends and family

House stuff:
-Paint living room and upper/lower hallways, kitchen, etc. (painted swatches have been up since January, yikes!)
-Paint/build benches for foyer/stairwell area and hang hooks for little coats
-Paint main floor bathroom (wallpaper removed in December)
-Finish upholstering our bed frame (since it’s currently bare wood and Craig finished it in December)
-Put up a fence around yard to contain our wild child
-Go through the sea of boxes in basement and start getting ready for our first yardsale!
-Fix deck out back
-Paint all trim in the house
-Paint/decorate Emily’s big girl room
-Buy bed frame for Em’s new mattress

Work Stuff:
-Complete life insurance course next two weekends and get over 80% on exam next weekend
-Take provincial exam following week
-Continue meeting with families in the evening to complete my field observation and start workign on my own
-Take mutual funds course after insurance course is out of the way, then start the exam/application process with the province

Meanwhile, I’m still going to be taking care of the boys and Emily, and Craig is away for chunks of time in May and June (and probably July for a few weeks).  So most of that indoor house stuff is on me to finish up.  yay.

I seriously just want to fast forward to August and have this baby here already.  I am still LOVING being pregnant again, it’s moreso that I want all of the preparations stuff to just be over with.  Despite Emily being fussy every evening in her infancy, I loved the newborn stage.  Newborn stage with a toddler around might not be as fun, so remind me of my love for it in August when I’m complaining!

Lastly, ever since (most) of my energy came back with the 2nd trimester, I’ve been trying to be a better housekeeper and to start taking more time for me (especially when it comes to getting ready in the morning and not just spending the day in pj’s or with no makeup and a mom bun).  I’m hoping I can keep those things up through these next few months as well as they’ve been making everything a bit easier since a clean house and feeling fresh and ready for the day make a huge difference in my productivity!

Please bear with me as I’m getting through these next few months!  Luckily we’ve got some vacations and time with family and friends on the horizon too, to make life a little bit easier.

Tuesday, April 5, 2011

bathroom transformation

IMG_0034

I actually completed this project while Craig was away in the Arctic in 2009, but hadn’t gotten a chance to post it yet. 

When we first moved into our condo, we made the mistake of painting most of the rooms right away, without waiting to settle in for a bit and figure out what colour would be best for each room based on lighting, use, furniture, etc.  The only exception to this is the bathrooms, which we left pretty much as is until I had some inspiration.  I can’t say that this bathroom reveal really has a theme, but it’s definitely an improvement!

Here’s the ‘before’ shot of our bathroom.  Both bathrooms were so underwhelming (and I wasn’t really in the blogging mode at that time) so we didn’t bother taking any photos of them.  As a result, this is actually the listing photo of the bathroom!

condo 1

You can’t really see it in the photo, but the cabinet and countertop is grey melamine, while the walls are a (very) pale beige colour.  Also see that white thing on the wall to the left of the shelves?  That’s the right bracket of the towel rack RIGHT over the toilet. 

We weren’t really wanting to spend tons of cash to revamp the bathroom, so paint, hardware and linens were our best friends.

First, I gave the cabinet a coat of sticks-anywhere primer, and then gave it 3 coats of semi-gloss black paint.  I used a paint brush and small foam roller to get the best finish.  Next I changed out the plastic (!!!!) handles for brushed nickel ones, as well as updated the towel and toilet paper holders.

IMG_0402

The countertop is actually still the blah grey colour, but we were happy with how much the room was improved with just the black paint that we’re content to wait for the perfect solution.  Rustoleum now has countertop paint finishes that we might look into.

Next, I painted the walls ‘Naturally Calm’ which is a Glidden colour.

IMG_0033

The final touches were the shower curtain (actually just a single panel of a normal curtain), some art/decorations on the walls, and some crisp (and easy to clean!) white towels for guests.

IMG_0035

The flooring is one thing that WILL be going soon as the old linoleum is starting to look a little worn.  At least it’s a pretty neutral colour and pattern, so it hasn’t conflicted so far! I would love to put a nice framed mirror right in front of the cabinet and have an updated light fixture above it, but the globe lighting is wired right in the middle of the wall so it would involve some electrical work and we’re not sure how well affixed (read: glued) that mirror is to the wall.  Additionally, I think the full size mirror actually makes the room seem bigger, so in light of the fact that we’re hoping to sell soon, it might sell better with a bigger looking room.  Maybe not.  What do you think?  If we can’t I’m going to get some nice trim and create a big frame for it so it at least looks a little more custom.


What do you think of the changes?  Not a bad transformation for less than $75 right?


Thanks for stopping by!


beforeAndAfterButton_thumb[1]

Wednesday, February 2, 2011

groundhog day giveaway

I’m not sure about Punxsutawney Phil and the rest of the groundhogs, but around here Wiarton Willie has declared that we will have an early spring!  I read on Wikipedia that the groundhog’s are only 39% accurate, so more likely than not we have a LOT more Winter to suffer through, but I think such a hopeful prediction is something to celebrate!

Even if Spring is a lot way off, I’m sure you wouldn’t mind picking up some new moisturizers to help combat that dry winter skin:

Or maybe you’re fighting the winter blues and would like a reminder of the warm weather to come?

Regardless of your tastes, I’ve got a giveaway you’ll enjoy!  I’ve got a leftover Groupon to The Body Shop (US Stores Only) that I’d like to giveaway.

What You’ll Get:

$40 gift certificate to The Body Shop
-US only
-in Store only
-MUST be used by February 25th


How to Enter:

Leave a comment below telling me whether you’re looking forward to Spring, or your enjoying this snowy (snowy!) Winter we’ve been having.

One (1) extra entry can be earned if you tweet about this giveaway @CanadianRhapsdy.  Please come back and leave a comment saying you’ve done so!

Contest closes Monday, February 7th at Midnight.  Just in time for Valentine’s Day!


This giveaway is NOT sponsored by Groupon or The Body Shop.  I am just clearing out a gift card I cannot use in time!

Sunday, January 23, 2011

52 weeks of organizing

Craig and I have made an appointment to go and look at that house on Monday (as well as a similar one down the road), but I have a feeling we’re probably not going to take the plunge at this time. A lot is still up in the air in terms of where he will be working, if we’ll have to be moving for his job, and if I will be going back to work in August. Living where we are right now, we’re able to put a couple thousand in savings each month even with me on Mat leave, and I’m leery to go from that to being house poor when we lose that last 55% of my income. We want to make the decision as to whether I will stay home with Emily based on what we want for our family and not because of house (or auto, cell, credit card bill) payments.

That house though, it could tempt us. We will see.

Regardless of whether we will be moving sometime soon or not for another year or so, it’s never a bad a idea for us to continue simplifying our condo so that it’s not just easier to live in in the mean time, but also so that we don’t have as much to move when the time comes!

Laura at OrgJunkie.com is having a 52 weeks of organizing series, and I’m taking up the challenge and hoping to complete one organizing project each week. Below are my plans each week (so far). I will update it each week with what I’ve accomplished and what new tasks I’ve added.

1. Toy area for Emily in Living Room
2. Toiletries in Ensuite
3. Coats, hats and gloves
4. Kitchen utensils and gadgets
5. Books and magazines
6. Cooking areas
7. Paper clutter control
8. Emily’s closet
9. Laundry supplies
10. Pantry
11. Tools
12. Junk drawer

As you can see, I don’t have a full list yet, but I’m just getting my creative juices running in terms of what I can whip into shape around here.

Thursday, January 20, 2011

10 things I love about my house

In light of my recent displeasure at our small condo, I figured a little thankfulness was in order.

My wonderful hubby reminded me that we have a warm home to come home to when many others are sleeping on the street.  So true.

10. a cozy fireplace to warm up with

9. big bright windows in the living room

8. lots of food in our pantry (enough that I’m attempting a pantry challenge this month)

7. a beautiful nursery for our baby girl

6. affordable payments when some are struggling to make ends meet

5. a big cozy bed to *ahem* cuddle in together

4. the ability to paint walls and make changes because it is our own

3. our ensuite bathroom

2. room to share a cozy meal with friends

1. all of the memories it has housed in the past 2.5 years; our first nights after our wedding, many meals shared together, get togethers with friends, bringing Emily home, etc.,

Monday, January 3, 2011

i want, i want, i want!

I would consider myself a logical person.  I research the heck out of things before taking the plunge so that I can get the best deal, and own practically a shelf (many gifted) of pregnancy and parenting books, just so I can be prepared.

The past few months though, I have been getting increasingly annoyed at our small condo.  All of the extra stuff that comes along with having a baby has got me feeling crowded in this 790 sq ft love nest we bought when we got married.  Needless to say, I’ve been spending an inordinate amount of time skimming the MLS for a good deal.

The town where we live is a resort town and often one where the big city folk retire to, so prices can be a bit inflated.  Back when we were getting married, we knew we wanted to purchase a home on Craig’s income alone, and had a specific amount we wanted to pay per month.  In essence we were trying to maximize how much equity we had built up by the time we were ready to upgrade (i.e. less mortgage amount with same payment and interest amount means more in principle being paid down each month). 

Now, 2.5 years later, we have $26,000 in equity in our small, $130,000 condo (part of which is due to purchasing it as an estate sale for well below value). 

I’m ready to move, we have the money for a down payment, and we’ve found a house we both really like, so what’s holding us back?

Well after Craig is finished his paid leave at the end of February, there is no guarantee that he has a job to go back to where he was working before.  He’s currently exploring other job possibilities to fall back on, so I’m not overly concerned, but it does throw a BIG wrench in my moving dreams when there’s not a 100% guarantee that his income will be reliable.

What can I say, I’m a logical girl. But still, I WANT!!

Here’s the house we’ve been drooling over.  It’s nothing amazing to look at, but it has all of our criteria for a house we can grow in to, and it has loads of potential for renovations and making it our own.

MLS Listing

house 1

It has 4 bedrooms, 4 bathrooms (one of them an ensuite), 2 living spaces, a garage and a nice big backyard.

What would you do?

Wednesday, November 10, 2010

clutter-free Christmas goal

Centerpiece

Inspired by the folks at Young House Love, I’ve decided that our home needs a little de-cluttering.  Christmas always seems to bring in a new wave of ‘stuff’ (necessary, wanted, or not) and we have very little room in our little condo as it is!

So, from now until Craig comes home (early December) I am planning on getting rid of 100 possessions.  This could include clothing, home decor, tchotchkes, baby stuff, or books – the possibilities are endless!

To start things off, tonight I got rid of two expired bags of Doritos Cool Ranch chips from our pantry.

Along these same lines, I joined a ‘biggest loser’ competition with some other mom’s in my town, so for the next 5 weeks I’m working on getting rid of some body clutter at the same time.  For the purpose of accountability, my beginning stats were: 154.4lbs, 29.9% body fat.  Wish me luck!

Wednesday, September 22, 2010

Nursery Reveal

DSC02613

Emily was enjoying a long nap this afternoon, so I figured it was about time I finish things up in the nursery and get a reveal post up (especially considering she is almost 6 weeks old!).  She has actually been enjoying nights in her crib a few times now since she’s quite a noisy sleeper, and if she’s having a good night, it’s easier on mama to have her in her own room (which is honestly like 6 steps from my bed).

I’m realizing now I should have tried a lot harder to get the nursery reveal done long before she arrived, as it was much harder now to find the time to get it tidied up and arranged how I wanted it (plus we had her window replaced yesterday, so everything got shoved out of the way).

DSC02614

If you  remember, I created a polyvore of the elements I’d like to include in her room:

Baby's Room


For the most part, I managed to stay pretty true to this vision, picking up a few items from IKEA and online, and refinishing a dresser we had in our bedroom.   The room colour is Rice Grain by SW (which has since been used by The Nester in her living room!).
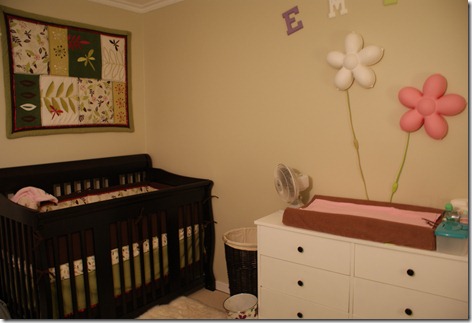
DSC02615

It all started with her bedding.  We tried to pick a neutral bedding that we could use again in the future if we were having a boy, so we went with one that had greens and browns as the primary colours and that had a neutral theme of leaves.  It seems a little bit more on the feminine side to me now, but it might be because we’ve filled her room with other girlie things.

crib 2

Here’s the bedding in her convertible crib and the sleep sheep that helps lull her to sleep each night.  Strangely, it has a ‘whale call’ as one of the settings – I’ve never heard of that as being a white noise for babies before!

Due to the fact that she’s not supposed to have any blankets on her for the first year if possible, I put the quilt that matches her bedding set on the wall above her bed.  It functions as art and I don’t have to worry about it hurting her if it falls of the wall!

crib 1


Next, we picked up a BILLY bookshelf from IKEA.  I looked forever for the set of doors for the bottom and was concerned when I learned that they had been discontinued.  Luckily, I stopped in at the North York IKEA on my way to pick up Craig from the airport for his leave (and Emily’s birth!) and found that they had some of the doors still in stock!

bookshelf1


I’m so glad I found the doors as they provide additional diapering, bath and medical supplies storage without it being seen.  I’m intending to get some different knobs on the doors so that down the road when we’re baby proofing, we can latch it shut.

bookshelf2

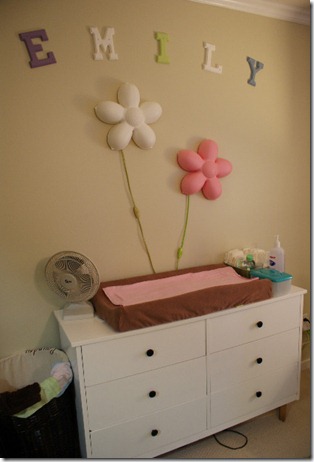
The rest of her diapering supplies are on the top of her dresser along with the change pad.  I purchased the two IKEA wall lights for above the change pad as a friend of mine said they are great for night time diaper changes as they provide enough light to get the job done but it’s diffuse enough that it doesn’t wake the baby too much.  I’ve found the pink one really useful for when I’m breastfeeding her in the rocker – she doesn’t even notice the light but I can see enough to guide her on properly.  Above are the letters I painted and had Craig put up a few days before she was born.  It’s a good thing we didn’t have a surprise (boy) the day of!
change table 


I showed you the curtains and rocker before, but here they are again:

 curtains 9


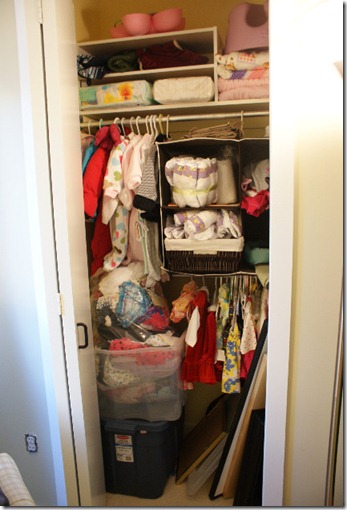
The closet still needs some work in terms of organization, and I think I’d like to get a second bar underneath and get rid of the cubbies, as she’s got lots of cute stuff to hang up, and will have even more with the colder weather that’s approaching.  Her winter coats will be moved to our front coat closet in a month or two. :)  My organization system for her clothing has become a bit overwhelmed because of the sheer generosity of our friends and family (4 showers!), but I’m slowly finding ways to organize and store everything.
closet  

My mom found this great cubby shelf on sale a few months ago, so I picked up some green bins from Walmart to match the carpet and filled them with toys, decorations still to go up, stuff that I may re-gift, and extra diapers that people have passed on.

cube shelf


I used the top of it to display a pretty plant we were given from Craig’s company overseas.  An etsy seller was selling prints like the one I made for her name below for over $30 dollars, so I used Photoshop to make one that’s similar, and spent only 2.49 for the 8x10 print.   I didn’t leave quite enough of a border, so I may reprint it again in the future, but I think it’s a really unique way to display and remember the details of her day.  I also used a shadow frame to display the TINY hat they put on her at the hospital (that seemed big at the time!) and her hospital bracelet.  I got the frame at Dollarama and painted it to match her room.

name art


It’s not being displayed in her room at the moment, but here’s a BEAUTIFUL quilt Craig’s Aunt Hope made for her.  It matches our couch perfectly, so it’s in the living room for her tummy time right now.  She even hand stitched her name and the date on one corner, so it’s a great item to get lots of use of then put in her keepsake box for her to share with her own kids down the road. :)

hope quilt


I still need to get the mirror and other art/photos up above the cubby shelf, as well as something for the wall behind the rocker, but otherwise, I am pleased with how the nursery has come out.  The bookshelf as probably the most expensive item other than her crib, and both can come with us when we move and are flexible to our needs in the future.  The crib can convert to a double bed frame (it’s a sleigh bed style) so after all of our kids have worked their way through it, we can put it in a future spare bedroom or even use it in our bedroom if we feel like the queen size bed is feeling a little large once we’re no longer welcoming little ones in the middle of the night!


A tour of her room wouldn’t be complete without a shot of the girl herself in there!  I showed you a photo the other day of her in her crib, so here’s a photo of her lounging on her comfy green rug.

em in room

Being very patient while Mom shuffles around trying to get the perfect shot!

emily  

I hope you enjoyed her room tour as much as I enjoyed collecting ideas and making it become a reality.  It was such a joy to create a warm, comfortable space for her to grow and learn in!

Monday, October 5, 2009

Simple Fall Decor

Now that summer is over and I'm s-l-o-w-l-y transitioning our home into the fall season, I'm finding my taste in decor has become a lot more simplistic.

I had the opportunity to attend a tent sale at the candle factory near where I work, and I picked up quite a few items for my fall decorating (and a couple for my Christmas Garlands and decor). I tried to look at the items through 'decorator glasses' and see the multiple uses an item could have, and how I could improve an item that wasn't my taste.

My first trip there (yes, there were two), I picked up a small wall shelf ($6) and a small(ish) wooden pillar candle holder ($3). I was going to pass them up at first because they had some unfortunate 'shabby' details, but I figured I could cover the red/hot pink up with a permanent marker, and it worked perfectly!


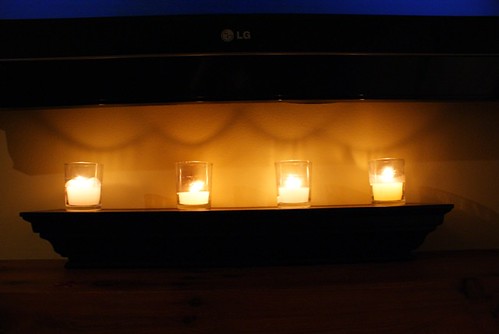
After covering up all of the red detailing, I put the shelf on the fireplace mantle under our TV and threw some candles on there. Delightful!


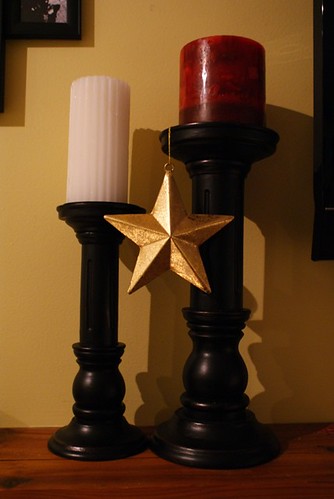
A couple of days later I went back to the sale and managed to snatch up a medium sized candle holder ($5), and gave it the same sharpie treatment. Here's what I came up with with the two candle holders, some candles from around the house, and one of the gold metal stars I bought at the sale ($1 each). It's not fall specific decor, but it brings in some of the richer colour of the season, and I love it!


Next, I added a few new things to my frame wall, and rearranged the living room a little bit to open the space up a little more.


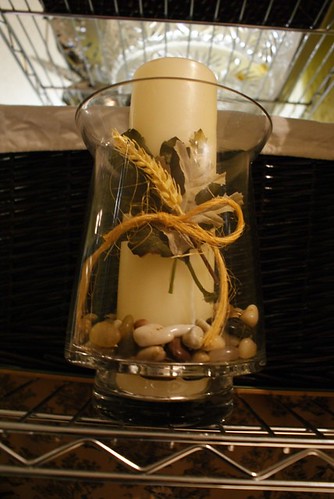
One other fall decoration I created was modelled after a Ballard Designs copy done by Kara @ Creations by Kara. I used some leftover leaves and a wheat stalk and tied it to a candle using some twine. I put it on my kitchen shelves against a wicker basket which compliments its colours.


A couple of weeks ago I got tired of looking at the random empty space at the top of the 'fridge cave' and I used some material I had in the house to cover it up. You can tell by the right side that it's not 100% done, and I'm still looking for some cute fringe to glue along the bottom, but it's definitely an improvement, and it means I can use it for real storage instead of worrying about my storage looking 'nice'.


I'm putting this up on Kimba's DIY Day at A Soft Place to Land.


Thursday, September 10, 2009

2 days late. My bad.

This probably should have gone up 2 days ago when I, um, promised I'd have it completed by. In actuality it could have been up in time, however I was hit by a lazy mood after I'd completed it, and I didn't feel like spending 20 minutes uploading the photos and writing a post.

This is really just phase 1 of the laundry room redo. I just need to get stuff off the floor and organized so that (A) I can use the space, and (B) I can see what needs to be done.

Now that this is completed, I'm on the hunt for some fun and sassy decor elements I can cram into that small space. If you have any ideas, let me know!

On to the photos.

It really doesn't look very different, does it? It's probably b/c all I did was clean it up and rearrange it. And add more stuff. At times this project seems solved only by moving to a bigger home.

A new dryer wouldn't hurt either.

Tuesday, September 8, 2009

Today's project


Tonight I'm planning on working on our laundry room/linen closet/pantry/storage room.

Here's a pic of it in its current state:


As you can see, it's not only extremely messy, but it's also in need of some frugal decor! At least enough to make me stop cringing every time I walk by the door.
Yes, we also are in great need of a new dryer. This one still works (despite needing to be held closed by duct tape b/c it likes to pop open when clothes are pushed against the door), so we'll be waiting until we've saved up enough in our home repairs account to cover it.

Here's the shelf that is our linen closet/pantry.


I'd like to make it a little more organized and streamlined, and maybe put some of my less often used kitchen appliances in here. We'll see.

Check back for updates!

Monday, September 7, 2009

Long Time Gone

Sorry I've been gone for so long.

It has been a busy couple of weeks both at work and with family stuff (more family weddings the next 2 weekends!), so I haven't had much time for posting.
I've also been intentionally avoiding posting as much as possible until 22 September, as not only is this a 'life without Craig' blog, but I'd also like to get in as much time with him as I can before he goes!

Anyways, this past weekend I've been busy with some projects around the house, and in the coming week I'll be sharing more about each one. Below are two teaser photos, but more details and photos will be coming soon!


As well, I've been slowly chipping away at my list of goals that I'd like to accomplish while Craig is gone (the weight loss being exceptionally SLOW), and I have a few more I'm going to add soon.

I hope everyone has been enjoying their long weekend! I got to take friday off from work took a trip to IKEA, so it definitely got off on a good foot! Craig and I went to the drive-in with some friends from church last night, and we stayed for 3 of the 4 movies (it was a dusk 'til dawn night). Needless to say we got home at 4am this morning!


Thursday, July 30, 2009

DIY Day


Today is DIY Day at A Soft Place to Land, and I wanted to show an old brass candle holder that I found and repainted to make it something beautiful!

Located nearby us is a store called the Meaford Factory Outlet, and it can be hit and miss as to whether you will find something of decent quality there. While browsing the other day, I stumbled upon a table of clearance items, and most of the table was covered with various brass decor (some becoming quite tarnished). I quickly snatched up 2 brass candlesticks (I'll post those at a later date), and the brass candle holder I'll be showing below.

*Please forgive me as I forgot to take 'before' photos*


After painting it black, I decided that it would look nice with some distressing, so I brushed on some gold paint in a few areas. It looks fantastic on our dining room table and it's simple enough to be dressed for any occasion.

This project turned out so well that I am inspired and encouraged about completing all of my summer projects.

Yummy Cauliflower Soup

Today I made some Cauliflower Soup that I can freeze for work lunches. We've been having unseasonably cold weather for July, and it's gotten me into a fall mood a little early I think.

My basic philosophy for soup is that the less you follow the recipe, the better. Much of my cooking inspiration comes from The Joy of Cooking Cookbook (see bookshelf). If there is ever a technique or base for a recipe that I am unsure of, or if I need to use up some veggies in the fridge before they spoil, I know I can always turn to my JCC for enlightment. But again, I don't follow the recipes exactly. What this typically leads to is that I rarely make the same exact thing twice, which lends variety to life; however on occasion it would be nice to know some exact measurements when it turns out just perfectly.

Anyways, back to the soup I made tonight. The recipe that follows is not meant to frustrate you, but instead allow you to adjust the recipe to your own tastes and what you have on hand. It is how I typically make this soup, but certainly is not the "right" way.


Yummy Cauliflower Soup

Onion, chopped (I use approx. 1/2 an onion)
Carrot, chopped
Parsley
Chopped Vegetables (celery, broccoli, leeks, etc., would all be good additions)
Cauliflower, chopped (I used a full head of cauliflower)
Chicken Broth
Butter
Milk
Cream
Flour

In a stock pot, saute onions, carrots and other vegetables in butter, until onions begin to brown. Add in cauliflower and parsley, and with the heat on low, allow all of the veggies to 'sweat'. You'll need to keep the lid on for this and it'll take about 20 minutes. (You can clean up your cutting board and knives while you wait...).

Next add in the chicken broth and bring the whole mixture to a boil, then allow it to simmer for a few minutes while you prepare the roux. I like to melt some butter in a small pot on the stove and then add in 5 or 6 tablespoons of flour (cornstarch in a pinch), stirring constantly. Allow it to brown a bit and then slowly add in a few cups of milk, while stirring. Once this mixture is smooth & hot (it takes some practice to create a good roux and then incorporate the liquids - don't be discouraged if it doesn't work perfectly the first time, and certainly don't throw it out - this soup is beautifully imperfect, and it will all come together in the end).
Next, add a cup or two (depending on your desired creaminess and fat tolerance) of cream to your white sauce and add the whole pot to your simmering soup.

Allow to simmer, stirring occasionally, for about 20 minutes.

You're done!

In our house, soup is used for work lunches and our after-church lunch on sundays (usually with Grilled Cheese - Craig's specialty :). I'll usually dump it all into a large container and put it in the fridge to cool overnight.


The next day, I'll divide the soup into medium sized zip lock bags, wash & dry the container, and then lay the bags flat inside the container. The whole thing is then thrown into the freezer and once frozen, I can take the soups out of the container and fit them into the spaces in the freezer. They also easily fit into a sandwich sized container, into which I can also fit some crackers or shredded cheese if I'd like. The reason for this whole charade is that I'm very afraid of leakage on the way to work, and as well, things in bags just work a whole lot better when you're trying to make a fridgetop freezer stretch to hold make-ahead meals.

Tuesday, July 28, 2009

Summer Projects

I have a bunch of projects that I would like to finish this summer while the weather is nice. We don't have a garage, so once the snow comes (and boy will it come!) I won't be able to refinish any furniture.

Most of my projects are in our master bedroom/closet, but there are a few others (and a few on my honey-do list for before he goes) that would turn the condo we live in into a place I (we) love.

1. Refinishing Furniture
We have two pieces of furniture in our bedroom that either need to go, or need to change. Craig brought with him a blonde wood veneer wardrobe that sticks out like a sore thumb in our bedroom. The rest of our furniture is black, so I'd like to sand and paint it, and throw on some new hardware. Living with Lindsay has a great tutorial on the process here.

Another thing I'd like to refinish in our bedroom is the dress that we've got in our closet. Its at least a real wood, but the colour's still all wrong for us. My only concern about refinishing it as opposed to replacing it, is that the drawers are very shallow, so you can't stack much before it starts catching when you close it, and it's not deep enough to allow 2 stacks deep.

2. Flooring
We have carpeting and parquet wood flooring in our living room, kitchen and hallway respectively, and we'd like to replace both this summer.
The carpet is a very light creamy colour, which doesn't work for us and our dog. She's become occasionally incontinent as she's gotten older (she's 15), and there are a couple of resulting stains around. The parquet is really ugly despite the pictures (A) and it was not properly put down by the previous owners, so the individual rectangular tiles keep coming up (B).


3. Lastly, I'd like to recover the old, tired dog bed that's in our room, at least with some fabric that matches the room's decor. Along those same lines, I'd like to make/buy cheap some new covers for the furniture in our spare room.


Isn't that shameful? It's a work in progress.

LinkWithin

Related Posts with Thumbnails